How to Make Custom UV Printed Coasters
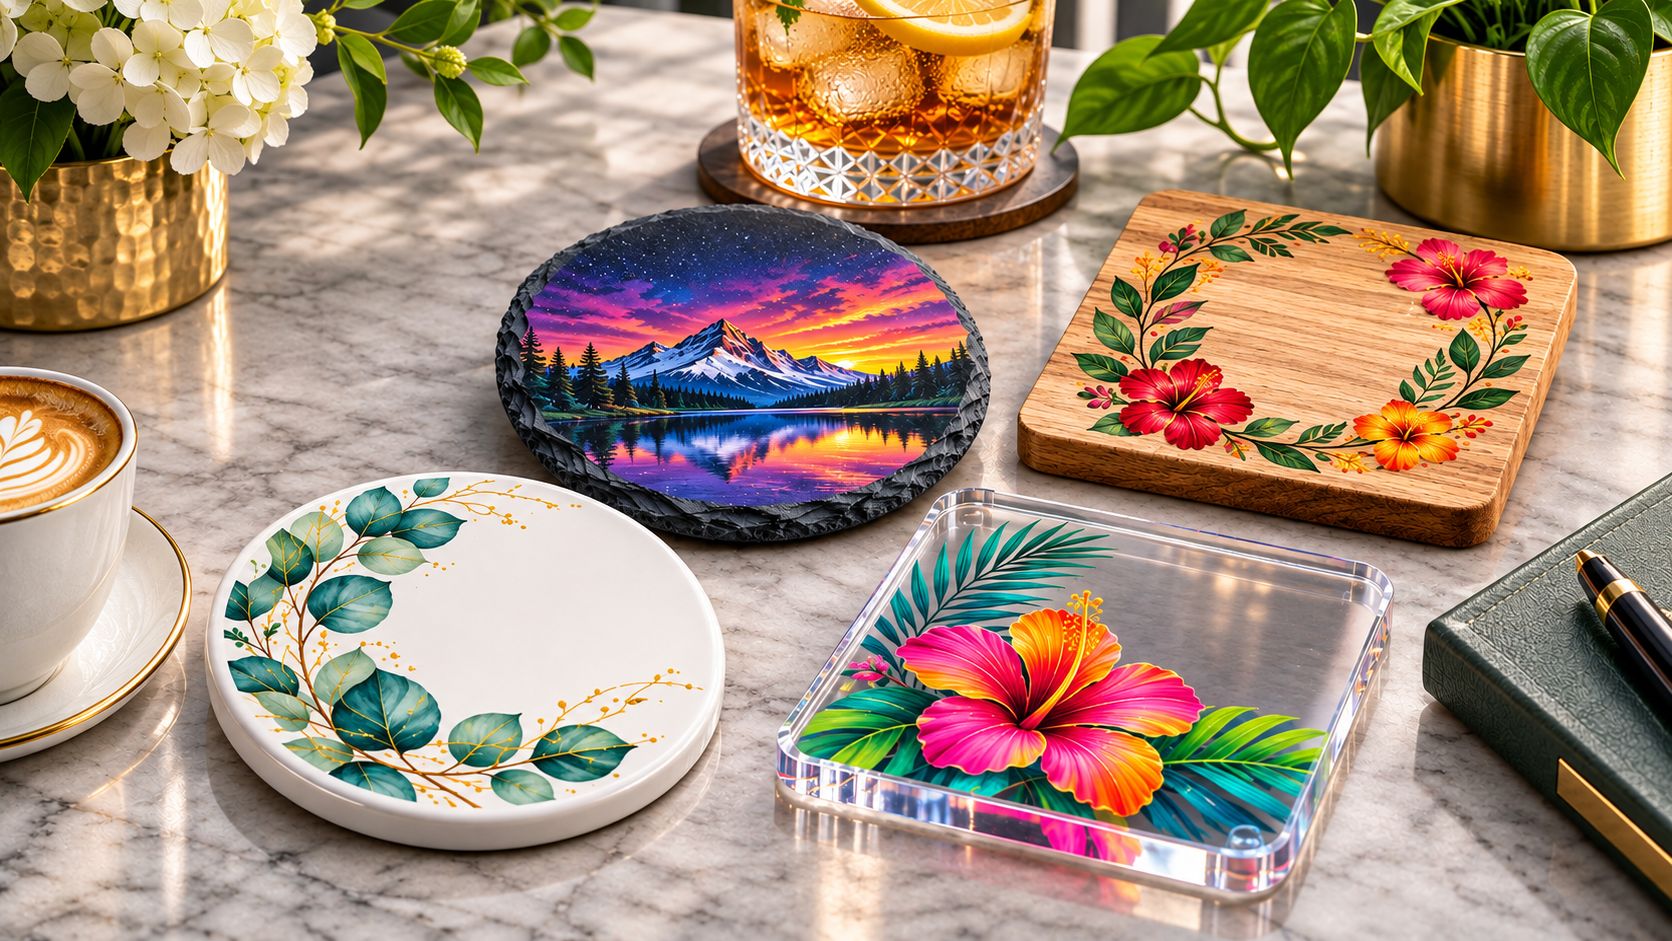
Custom UV printed coasters are a practical product for gift shops, wedding suppliers, cafés, promotional merchandise businesses and print studios. With the right surface preparation, a UV flatbed printer can add full-color artwork, personalized names and branded graphics directly to compatible coaster blanks. The challenge is choosing the right material and producing a finish that can withstand the way customers actually use a coaster. This guide explains how to print custom coasters on slate, wood, cork, ceramic and acrylic; when to use white ink; how to position multiple blanks with a jig; and how to plan costs and quality checks before accepting a commercial order. Quick answer: Yes, a UV flatbed printer can print on many suitable coaster blanks, including certain slate, prepared wood, coated cork, ceramic and acrylic surfaces. A reliable result depends on the exact surface finish, ink adhesion, printhead clearance, white-ink settings and the coaster's intended use. Always test a sample before producing a batch. UV ink curing alone does not guarantee resistance to scratches, condensation, hot cups or repeated washing. Why Make Custom Coasters with a UV Printer? Coasters offer a compact, repeatable product format. A business can change the artwork while keeping the basic blank size, packaging and positioning jig consistent. That makes them useful for personalized orders as well as small runs of branded merchandise. Common customer groups include: Cafés and restaurants: branded table accessories, seasonal artwork and retail gift sets. Wedding and event businesses: names, dates, floral designs and matching table gifts. Corporate buyers: logos, conference giveaways, employee gifts and welcome kits. Souvenir stores: destination illustrations, local landmarks and themed collections. Individual gift buyers: pet portraits, family photos, initials and custom illustrations. UV flatbed printing is well suited to changing designs between short batches without traditional printing plates. However, it does not remove the need for product testing, daily printer maintenance or finishing work. For more applications beyond coasters, explore 35 things to print with a UV printer . Best Materials for Custom UV Printed Coasters There is no universal “best coaster material.” A coated ceramic coaster and an unglazed ceramic coaster may require different preparation. Likewise, raw cork can respond differently from sealed cork, and one type of acrylic coating may adhere better than another. The following table is a starting point for selection, not a compatibility guarantee. Material Visual appeal Practical printing approach Main concern Slate Natural dark stone with irregular edges Use flat, stable blanks; test white underbase beneath colored artwork Uneven surface, dust, edge chips and ink adhesion Wood or bamboo Warm texture for gifts and hospitality Prefer smooth, stable and appropriately prepared surfaces Grain, porosity, coatings, moisture and warping Cork Lightweight, natural and soft Prefer flat, firm, appropriately sealed blanks; test ink and primer compatibility Porosity, compression, flaking and inconsistent detail Ceramic Smooth, easy-to-style decorative surface Test the exact glaze or coating; white ceramic may not need a white underbase Glaze chemistry, coating adhesion and moisture exposure Acrylic Clear, frosted or colored modern finish Test the exact acrylic surface and decide whether to print on the front or reverse Scratches, adhesion, heat exposure and layer orientation Slate Coasters: A Premium Dark-Surface Option Slate creates a distinctive, premium-looking coaster, especially for landscape illustrations, restaurant branding and rustic gift sets. Dark stone can reduce the apparent brightness of CMYK inks, so an appropriate white underbase often improves color visibility. Choose slate blanks with a stable, printable top surface. Natural cleft texture, raised ridges and loose dust can affect printhead clearance and image sharpness. Avoid assuming that two pieces from the same box have identical thicknesses. Check the highest point of the actual blank and test ink adhesion on the surface finish supplied. Wood and Bamboo Coasters: Natural-Looking Personalized Gifts Wood works well for weddings, cafés and gift packaging. Smooth, prepared blanks generally provide more predictable results than rough, unfinished pieces. Wood grain, sealers, wax, oil and surface porosity all influence how printed graphics appear and adhere. For pale, suitably prepared wood, some designs can be printed in color without an opaque white backing. On darker wood, a white underbase may help preserve the colors of a photograph or logo. Test both looks rather than using one setup for every design. For more detail, see How to Print on Wood . Cork Coasters: Test the Surface Before Selling Cork is attractive because it is lightweight and has a natural appearance, but it can be one of the more challenging materials for crisp UV printing. Open pores, surface dust and compression can reduce detail and make the finish less consistent. For commercial work, start with a flat, firm, pre-finished or appropriately sealed cork blank that the supplier identifies as printable. Run adhesion and handling tests on that exact finish. A raw, crumbly cork surface should not be treated as automatically suitable for direct UV printing. Ceramic Coasters: Pay Attention to the Glaze Ceramic coasters are often a strong choice for detailed artwork because a smooth, white surface provides a bright visual background. On a compatible white ceramic coating, CMYK artwork may not need a full white underbase. Dark or colored ceramic may benefit from white ink if the ink system adheres to the finish. A glazed coaster, an unglazed porous coaster and a sublimation-coated coaster are not equivalent UV printing surfaces. Evaluate the coating before production. The EraSmart guide to UV printing on ceramics explains why individual glazes and finishes must be tested. Acrylic Coasters: Clear, Modern and Versatile Acrylic can produce vivid decorative effects, particularly with white ink and carefully planned transparent areas. Clear acrylic also allows reverse-side designs, which can protect the printed side from some direct contact when the coaster is displayed in the intended orientation. For a reverse-viewed design, the artwork normally needs mirroring, with the color and white ink layers ordered for viewing through the acrylic. Test the exact RIP setup and printed sample. Do not assume that printing on the reverse makes a coaster heatproof or scratchproof. UV Flatbed vs. UV DTF vs. Other Coaster Printing Methods For most flat rigid coaster blanks, direct UV flatbed printing is the primary process discussed in this guide . The blank is secured on the print bed, and compatible UV ink is printed directly on its surface. Method When it may fit Key limitation Direct UV flatbed Customized rigid coaster blanks in small and medium batches Surface compatibility, height control, adhesion and safe object holding UV DTF transfer Certain smooth, hard coaster surfaces where transfer application is suitable Transfer edges and durability require validation; unsuitable for many porous or rough surfaces Sublimation Coasters with compatible sublimation coatings Requires sublimation-ready blanks and a separate heat-transfer workflow Laser engraving Suitable wood, slate or other engravable blanks Produces an engraving effect rather than the same full-color UV print result For a studio focused on colorful slate, acrylic, ceramic or wood products, a suitable UV flatbed printer offers a direct workflow. If your main business is transferring decorative graphics onto compatible curved hard-surface gifts, UV DTF printers serve a different purpose. Equipment and Supplies Needed for UV Coaster Printing Before producing a sample, prepare the following: A UV flatbed printer with a usable print area and height clearance that fit the coaster and positioning fixture. Print-compatible coaster blanks from a consistent supplier and production batch. Artwork software and RIP software capable of controlling output size, color and white ink layers for the installed printer. Approved UV inks , including white ink where needed; varnish is optional only on configurations that actually support it. A positioning jig or fixture to hold round, square or irregular coasters without movement. Surface-cleaning supplies appropriate for the exact substrate and coating. Sample blanks for destructive adhesion, handling and moisture tests. Protective packaging that prevents printed surfaces and fragile edges from rubbing together. The printer's bed size and its effective print area may differ. Always design within the effective area for the exact model. Confirm the highest point of each coaster, not merely its nominal thickness, before setting printhead clearance. How to Make Custom UV Printed Coasters: Step by Step The following seven-step workflow applies to a typical small UV flatbed production setup. Exact software menus, printing modes, curing settings and maintenance procedures depend on the machine and ink system. Step 1: Select and Test the Coaster Blank Start with one material, shape and finish. Measure the diameter or width, thickness, curvature and height variation of several blanks from the intended batch. Check for chips, loose dust, glossy coatings, oil or wax that could interfere with printing. Print a sample before buying a large inventory. If the supplier changes its coating or production batch, repeat the qualification test. A material name alone is not a reliable process specification. Step 2: Prepare Artwork at the Actual Print Size Create a master file for the coaster's physical dimensions and visible artwork area. For example, a round blank requires a circular safe area, while a square blank with rounded corners needs adequate clearance from its edges. Use legible text, correctly licensed artwork and sufficient image detail for the chosen size. For names, dates and branded designs, keep editable text separate from the decorative background. Avoid placing critical text near rough slate edges or coaster corners that may chip. When batching different names or logos, preserve a production list that maps each design to its corresponding blank position. Step 3: Configure CMYK and White Ink Layers White ink is not automatically required on every coaster. Its purpose is to create an opaque layer when the substrate color or transparency would otherwise change the appearance of the artwork. A useful decision guide is: Surface and design Starting approach to test White coated ceramic, full-color art CMYK-only sample, then compare with any required white support Dark slate, photographic or bright artwork White underbase followed by CMYK when printing on the front Light wood with a natural-grain aesthetic CMYK-only sample for a more integrated look Dark wood, opaque full-color logo Test a white underbase beneath CMYK Clear acrylic viewed through the material Mirror artwork and validate the reverse-print layer sequence Cork Test the surface and adhesion first; white ink cannot fix weak substrate bonding For front-surface printing, white is commonly placed beneath color when an opaque backing is needed. For reverse printing intended to be viewed through transparent acrylic, the sequence is different. Use the printer's RIP controls and a physical sample to validate the desired order. Extra white layers should be added only after examining opacity, detail and adhesion; more ink is not always better. Step 4: Clean the Surface and Secure the Blank Remove dust, loose particles and fingerprints using a method approved for the particular material and coating. Some acrylic or painted surfaces can be damaged by the wrong solvent. If a primer is required, use only a primer verified to work with the blank and ink system, following its handling instructions. Place the blank in a stable jig. A positioning jig is especially valuable for round coasters, where rotating just a few degrees can make a logo appear off-center. For uneven slate, confirm that the whole print path has safe clearance and that each piece sits securely. Step 5: Set Height, Check Nozzles and Print a Proof Measure the actual product height, set the printer according to its operating procedure and complete the prescribed nozzle check. Select the appropriate RIP settings for the image, material and white layers. Use the machine's documented curing and pass settings rather than guessing a universal recipe. Print a single proof and inspect it from the intended viewing distance. Look for white halos around color artwork, missing fine detail, banding, fuzzy edges and inconsistent color coverage. Step 6: Batch Print with a Positioning Jig Once the sample is approved, arrange multiple coaster blanks in a repeatable layout. The jig should hold each item without covering the print area. Use clear position references so the digital artwork matches the physical slots. A larger print bed can accommodate more or larger blanks, but production capacity depends on spacing, fixture design, ink coverage, print mode and loading time. Do not quote a fixed number of coasters per hour without a timed trial using the customer's artwork. For a wider explanation of file setup, height checking and maintenance, see the EraSmart UV Printing Workflow Guide . Step 7: Inspect, Test and Package the Finished Coasters Inspect every batch for position, color, white-ink coverage, loose coating, chips and scratches. Keep separate sample pieces for adhesion and moisture testing, rather than damaging saleable items. Before shipping, make sure the printed surfaces and edges will not rub against each other in transit. Use sleeves, separators or protective packaging suited to the material. Heavy slate sets need different protection from lightweight cork or acrylic coasters. How to Check UV Coaster Print Quality and Durability A successful print is more than a colorful image immediately after curing. A customer may place cold glasses on the coaster, leave condensation on the surface, wipe it with a damp cloth or use it under a warm cup. Those conditions can expose weaknesses that are invisible during printing. Build a qualification checklist around the intended product: Visual inspection: Verify color, detail, centering, edge quality and consistency between pieces. Adhesion screening: Use a controlled method appropriate to the material to see whether the cured ink can be lifted or peeled. Handling and abrasion: Check how the print responds to ordinary contact, stacking and movement of a cup. Condensation exposure: Place a cold drink on a test coaster and examine any change after moisture has been removed. Cleaning exposure: Test the recommended cleaning method on a sample, following the coating and ink supplier's guidance. Heat exposure, when relevant: Evaluate the expected cup temperature and contact time rather than claiming universal heat resistance. Packaging trial: Pack and transport sample sets to identify rubbing, chipping or pressure damage. A cross-hatch and tape test can be one way to screen coating adhesion under controlled conditions. ASTM D3359 is a recognized tape-test standard primarily scoped for coatings on metallic substrates; it should not be treated as automatic certification for nonmetallic coaster materials. Select an appropriate test protocol for the actual material and product. If a print fails, check the surface treatment, contamination, primer suitability and print settings before increasing ink density. A thicker ink deposit will not necessarily solve poor adhesion. Common UV Coaster Printing Problems and How to Fix Them Problem Likely factors Practical next check Colors look dull on dark slate Substrate color showing through CMYK Test a suitable white underbase and check opacity Ink peels or scratches off Incompatible coating, dust, poor adhesion or wrong preparation Test the exact blank, cleaning method and compatible primer Text and logos are off-center Jig registration error or blank movement Recheck physical slots, digital layout and holding method Print edges look fuzzy Uneven height, rough surface or inappropriate settings Check the highest surface point, clearance and sample print mode White halo around artwork White/color layer registration or artwork trapping issue Inspect RIP layers and print a registration sample Cork details look uneven High porosity, dust or compressible surface Test a firmer, appropriately sealed cork blank Ceramic print rubs off Glaze or surface coating not compatible Qualify another coating or compatible preparation method Coasters scratch in packaging Printed faces rubbing or rough material edges Add separators and test the packed set For persistent failures, record the blank supplier and lot, coating type, ink, RIP setup, operating conditions and photographs. These records are more useful than changing several settings at once. Custom Coaster Design Ideas for Different Customers The same printing equipment can support different product collections without turning the article into a generic list of unrelated crafts. Wedding Coasters and Event Favors A coordinated floral design, couple's initials and date can turn a coaster into a practical reception favor. Wood and acrylic often fit a personalized wedding theme. For large guest lists, use a master template and approved spreadsheet to prevent misspelled names. Wedding orders also need a clear sample-approval deadline and sufficient time for packing and delivery. Branded Coasters for Cafés and Restaurants A café may use custom coasters for a house logo, signature drink artwork or limited seasonal merchandise. For a product used daily, prioritize surface durability, replacement cost and care instructions instead of choosing materials on appearance alone. Corporate Promotional Coaster Sets A branded coaster set can be part of a welcome kit, trade-show gift or company anniversary package. A consistent logo design can be adapted across several materials to create different gift tiers. Confirm artwork rights and brand color requirements before production. Souvenir and Tourism Coasters Landscape illustrations, landmarks, local food and city maps can become coordinated coaster collections. A souvenir store can offer several designs on the same tested blank, replenishing the popular patterns without redesigning the product's packaging each time. Personalized Photo and Gift Coasters Family photographs, pets, artwork and hobby themes are suitable for small personalized orders if customers provide sufficient image quality and proper rights to use the artwork. Offer clear proofing rules for image cropping, color variation and spelling changes. How Much Does Custom UV Coaster Printing Cost? Cost varies by material, purchased blank price, print coverage, setup time, packaging, defects and labor. Rather than promising a fixed industry profit margin, calculate the economics of your exact product and order size. Estimated cost per sellable coaster = total production cost before rejects / expected sellable quantity. Consider this hypothetical example for an order of 100 wooden coasters : Cost component Illustrative per-piece cost Compatible coaster blank $0.55 UV ink and routine consumables $0.12 Printing and handling labor $0.28 Packaging $0.22 Allocated setup and overhead $0.23 Total before rejects $1.40 If the plan assumes an 8% reject allowance, the estimated cost per sellable coaster is $1.40 / 0.92, approximately $1.52 . At a hypothetical selling price of $3.80 per coaster, the resulting gross margin would be about 60% before any costs not included in the example. This is a calculation example, not a supplier quote, validated market price or profit prediction. Real quotations must incorporate local labor, equipment depreciation, payment fees, marketing, taxes, shipping, sample development and returns where relevant. A four-piece gift set also needs its own packaging and assembly calculation. A workable commercial quotation should state the product material, dimensions, print sides, artwork variants, quantities, packaging, proofing requirements, deadline and handling instructions. Which EraSmart UV Printer Is Suitable for Coaster Printing? For small coaster businesses, the main purchasing questions are whether the blanks fit the effective print area, whether the object height is supported, whether the machine can reliably hold the product, and whether the required white ink workflow is available. EraSmart A4 UV Printer XP600: Compact Coaster Production The EraSmart A4 UV Printer XP600 uses a single XP600 printhead with a listed CMYK+WW ink configuration. Its product specification gives a 210 × 300 mm platform , an effective print size of 180 × 290 mm , and a 0–125 mm listed printing-height range . The product page lists no suction platform . This model can suit test samples, individual personalized coasters and modest batches of smaller blanks, subject to the coaster's actual dimensions and safe positioning. Plan a secure fixture because the A4 model does not rely on a built-in suction table. EraSmart A3 MAX UV Printer XP600: More Layout Flexibility The EraSmart A3 MAX UV Printer XP600 has a listed 300 × 450 mm print size , an up-to-130 mm print-height specification , a single XP600 printhead and an integrated suction platform. The larger working area can provide more room for multiple coasters, bigger gift pieces or mixed layouts. A fixture may still be necessary to keep small round or irregular products accurately registered. Do not infer production speed from print-bed size alone. Buying factor A4 UV Printer XP600 A3 MAX UV Printer XP600 Listed effective print area 180 × 290 mm 300 × 450 mm Listed height range 0–125 mm Up to 130 mm Printhead Single XP600 Single XP600 White ink capability CMYK+WW White and color printing supported Suction platform No Yes Best evaluation use Compact samples and small products Larger layouts and flexible batch production Both products need material-specific trials. Confirm the exact configuration, ink system and current product details before purchase. See the complete EraSmart UV Printer range for other working sizes and configurations. How to Start a Custom Coaster Printing Business Start with one material and a small set of designs. Build a repeatable process before expanding into every type of coaster. Select one customer group. Choose cafés, wedding suppliers, souvenir retailers, corporate merchandise buyers or personalized gift shoppers. Qualify one or two blanks. Record dimensions, source, coating, successful print settings and handling limitations. Create a compact sample collection. Offer several designs while keeping the same blank and packaging where possible. Set up a jig and job template. Make names, logos and artwork positions consistent across orders. Measure real production time. Track preparation, printing, unloading, inspection, finishing and packing. Document defects and reprints. Use actual yield when calculating quotes and lead times. Expand only after validation. Add another material or coating once the first product has a predictable quality and cost profile. If you are building a broader printing business rather than only a coaster line, use the EraSmart UV Printing Business Guide for additional planning considerations. Frequently Asked Questions About UV Printed Coasters Can a UV printer print directly on coasters? Yes, a suitable UV flatbed printer can print directly onto many compatible coaster blanks. The specific material, coating, flatness, ink system and intended use must be tested before production. What is the best material for UV printed coasters? There is no single best material. Smooth, prepared wood or compatible ceramic may be practical for detailed artwork; slate offers a premium dark-stone appearance; acrylic creates a modern effect; and sealed cork may suit natural-looking products. Choose based on adhesion testing, end use and customer preferences. Do I need white ink for slate coasters? A white underbase is often useful for bright or accurate CMYK colors on dark slate. The correct opacity and layer settings depend on the RIP, ink and blank. Test the artwork with and without white where appropriate. Can you UV print on cork coasters? Potentially, but cork's porosity, dust and compressibility can make results inconsistent. Prefer stable, appropriately finished cork blanks and test adhesion and handling. Do not assume raw cork is reliably printable. Can UV printers print on ceramic coasters? Yes, on suitable ceramic surfaces, but the glaze or coating is critical. Smooth white coated ceramic and porous unglazed ceramic can behave very differently. Test the exact finish. Can I UV print on clear acrylic coasters? Yes, when the acrylic surface is compatible with the ink. Direct front printing and reverse-viewed printing require different artwork and white-layer planning. Test the final viewing direction and durability. Is UV ink waterproof on coasters? UV curing does not automatically make every finished coaster waterproof. Moisture resistance depends on ink adhesion, substrate finish and actual use. Run condensation and cleaning tests before making a durability claim. Are UV printed coasters dishwasher-safe? Do not assume so. Dishwasher exposure combines water, detergent, temperature and repeated cycles. Unless the finished printed coaster has been qualified for that use, supply more conservative care instructions based on testing. Can I put hot cups on UV printed coasters? Only within conditions validated for the complete material and printed finish. Heat can affect coatings, adhesives, inks and acrylic differently. Do not claim heat resistance without representative testing. How do I print multiple coasters at once? Use a repeatable jig that securely holds each blank, map the digital artwork to each slot, confirm the tallest surface point and print a proof. The number of pieces per run depends on their size and the printer's effective working area. What causes UV ink to peel off coaster surfaces? Possible causes include contamination, unsuitable coatings, poor surface preparation or incompatible ink/primer combinations. Compare results on a controlled sample and change one variable at a time. Which UV printer should I buy for coaster printing? Choose based on material, size, height variation, sample and batch volume, and the need for secure holding. EraSmart A4 XP600 is a compact option for small pieces; A3 MAX XP600 provides more effective working area for larger or multiple-item layouts. Make Custom Coasters with EraSmart UV Printing Solutions Custom coaster production works best when attractive designs are supported by controlled materials, accurate positioning and realistic durability testing. Once you have qualified a blank, the same production template can support personalized wedding gifts, café merchandise, souvenir ranges and corporate coaster sets. Explore EraSmart UV Printers to compare suitable equipment. When contacting the team, share your coaster material, shape, dimensions, coating, expected order quantity and artwork requirements so a practical configuration can be evaluated.
Compact entry-level model with L800 print head, ideal for small items and hobby projects (120*210mm print size).
L800 print head with 210*290mm print size, perfect for small businesses and personalized gifts (0-130mm print height).
DX7 print head with 350*450mm print size, suction platform, and CMYK+WW+VV for high-volume production.
XP600 print head with 350*450mm print size, 5㎡/H speed, ideal for medium to large production runs.
Dual XP600 print heads with 5.5㎡/H speed, CMYK+WW+VVVVVV for enhanced color gamut and productivity.
Dual XP600 print heads with 350*450mm print size, designed for industrial-grade continuous production.
Large-format 420*600mm printer with dual XP600 heads, perfect for signage, panels and large materials.
Dual XP600 heads with automatic lamination, specialized for UV DTF film printing (width up to 350mm).
Specialized for phone cases (TPV/PVC/wood/metal), with 10-inch display and 0-10mm adjustable height.